Jetson OS Backup & Restore
Complete guide for backing up and restoring Jetson OS images on AFE-R750.
Overview
Jetson OS Backup and Recovery allows you to create backup images of your Jetson device and restore them to the same or different Jetson devices.
Part 1: Prepare Host PC
Step 1: Required Hardware
First, prepare the following:
- ✅ X86 Host PC with Ubuntu
22.04or later - ✅ Disk Space: At least
256GiB - ⚠️ Do not use VM - Use physical machine
- ✅ USB Cable: Type-A to Type-C with data capable
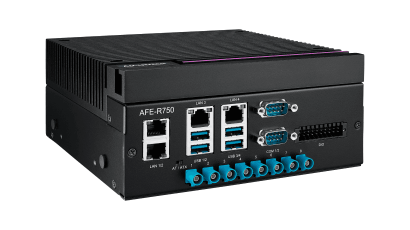
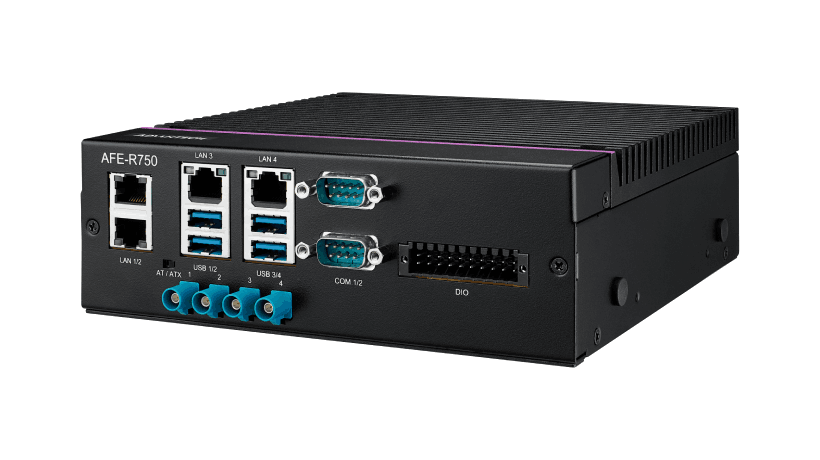
- ✅ Jetson Device: AFE-R750 example
Step 2: Prepare Image on Host
Download Image:
- Download the image from AFE-R750/ASR-A701 image download page
- Use sudo permission to extract:
sudo tar zxf AFE-R750_*.tar.gz
Important Notes:
- ❌ Do NOT use
root#or mouse to extract - ✅ Download the same JetPack image version as on Jetson device
Step 3: Install Pre-requisites on Host
After extracting AFE-R750 image, install required packages:
sudo usermod -aG dialout $USER
sudo apt update
sudo ./Linux_for_Tegra/tools/l4t_flash_prerequisites.sh
sudo reboot
Part 2: Put AFE-R750 in Recovery Mode
Step 1: Power Off and Connect
- Shutdown Jetson device first
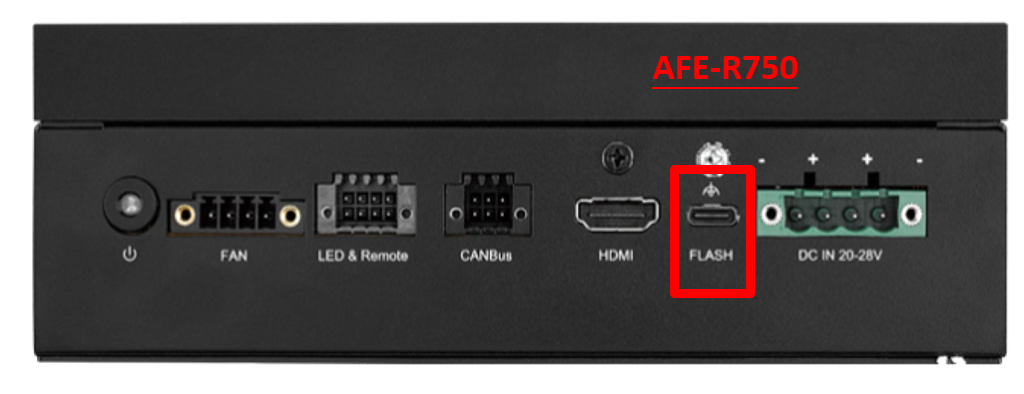
- Connect USB Type-A to Type-C cable from Host to its FLASH port
Step 2: Open Bottom Cover
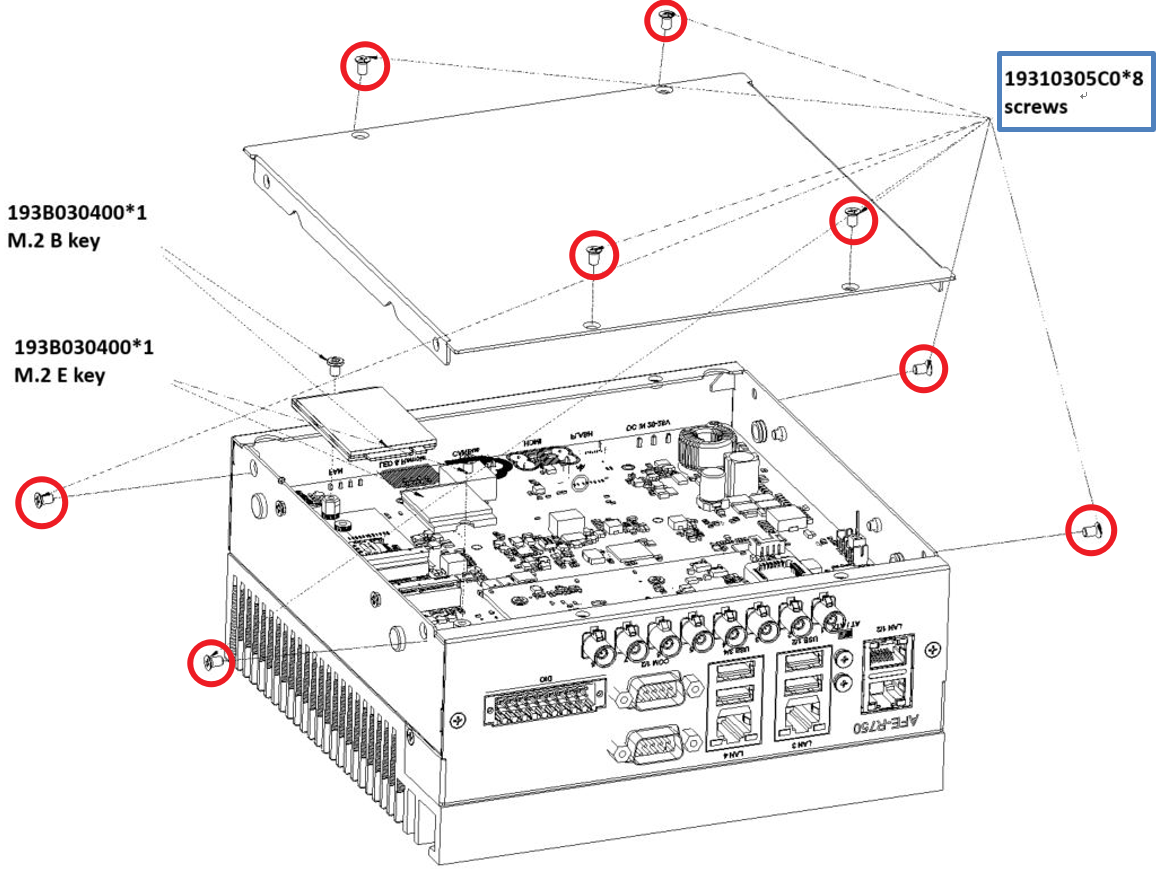
Open the bottom cover of AFE-R750 to access recovery pins.
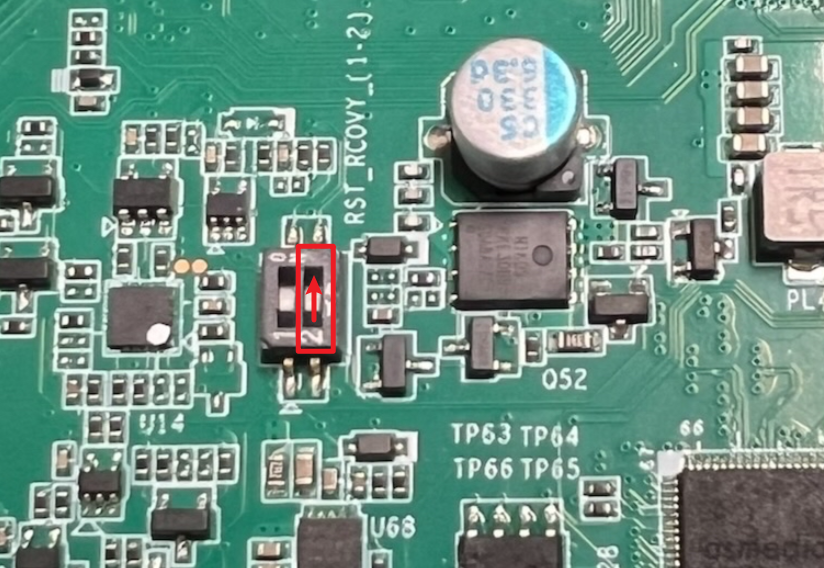
Step 3: Configure Recovery Pins
- Set the RST_RCOVY pin
2to ON position - Press the power button
- AFE-R750 will boot into recovery mode
Step 4: Verify Connection
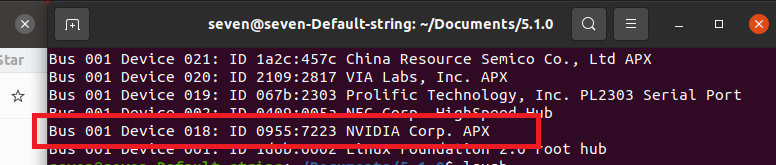
On Host, open terminal and execute:
lsusb
Verify that AFE-R750 is detected in recovery mode.
Part 3: Backup JetPack
Step 1: Navigate to Image Directory
On Host, enter image folder first:
cd Linux_for_Tegra
Step 2: Check Disk Space
Make sure free space is larger than storage size on Jetson device.
Step 3: Run Backup Command
Execute command to backup:
sudo ./tools/backup_restore/l4t_backup_restore.sh -e `<rootdev>` -b `<board>`
Parameters:
<rootdev>: Storage name- eMMC:
mmcblk0p1 - NVMe:
nvme0n1
- eMMC:
<board>: Jetson SoC type- AGX Orin 32/64G:
jetson-agx-orin-devkit - Orin NANO 4/8G and Orin NX 8/16G:
jetson-orin-nano-devkit
- AGX Orin 32/64G:
Example: Backup AGX Orin 32G NVMe:
sudo ./tools/backup_restore/l4t_backup_restore.sh -e nvme0n1 -b jetson-agx-orin-devkit
Part 4: (Optional) Compress Backup JetPack
After backup is completed:
-
Go back to previous folder:
cd ../ -
Compress backed-up JetPack with sudo permission:
sudo tar zcf `<Backup_Filename>.tar.gz` ./Linux_for_Tegra
Why compress to .tar.gz file?
- ✅ Parts of files in the image may be links or have different permissions
- ✅ If moving or copying the folder to other location, file properties or links may change
- ✅ This may lead to image corruption
- ✅ The
<Backup_Filename>.tar.gzcan be safely shared
Part 5: Restore JetPack
Step 1: Prepare Restore Image
On Host, extract the backed-up image:
sudo tar zxf `<Backup_Filename>.tar.gz`
cd Linux_for_Tegra
Step 2: Verify Recovery Mode
Make sure your Jetson device has already entered recovery mode.
Step 3: Execute Restore Command
sudo ./tools/backup_restore/l4t_backup_restore.sh -e `<rootdev>` -r `<board>`
Parameters (same as backup):
<rootdev>: Storage name- eMMC:
mmcblk0p1 - NVMe:
nvme0n1
- eMMC:
<board>: Jetson SoC type- AGX Orin 32/64G:
jetson-agx-orin-devkit - Orin NANO 4/8G and Orin NX 8/16G:
jetson-orin-nano-devkit
- AGX Orin 32/64G:
Example: Restore AGX Orin 32G NVMe:
sudo ./tools/backup_restore/l4t_backup_restore.sh -e nvme0n1 -r jetson-agx-orin-devkit