Multi-Sensor Function
This example demonstrates how to use multiple sensor data sources simultaneously while running multiple ISAAC functionalities.
Install
NOTE
Make sure your target system satisfies the following conditions:
- Advantech platforms
- At least 3 GB hard drive free space
- An active Internet connection is required
- Use the English language environment in Ubuntu OS
-
After selecting and installing Multi Sensor Function by following the instructions in the installer instructions. You will find the isaac_ros_kit folder under
/usr/local/Advantech/ros/container/ros-demokit/ -
Navigate to the folder and run the following command:
./launch_isaac.sh advanced_examples/isaac_ros_multi_sensor_demo
- The Multi Sensor Function will be displayed automatically: NOTE
The first time you run this program, it needs to download necessary files, which will take some time.
Configuration Guide
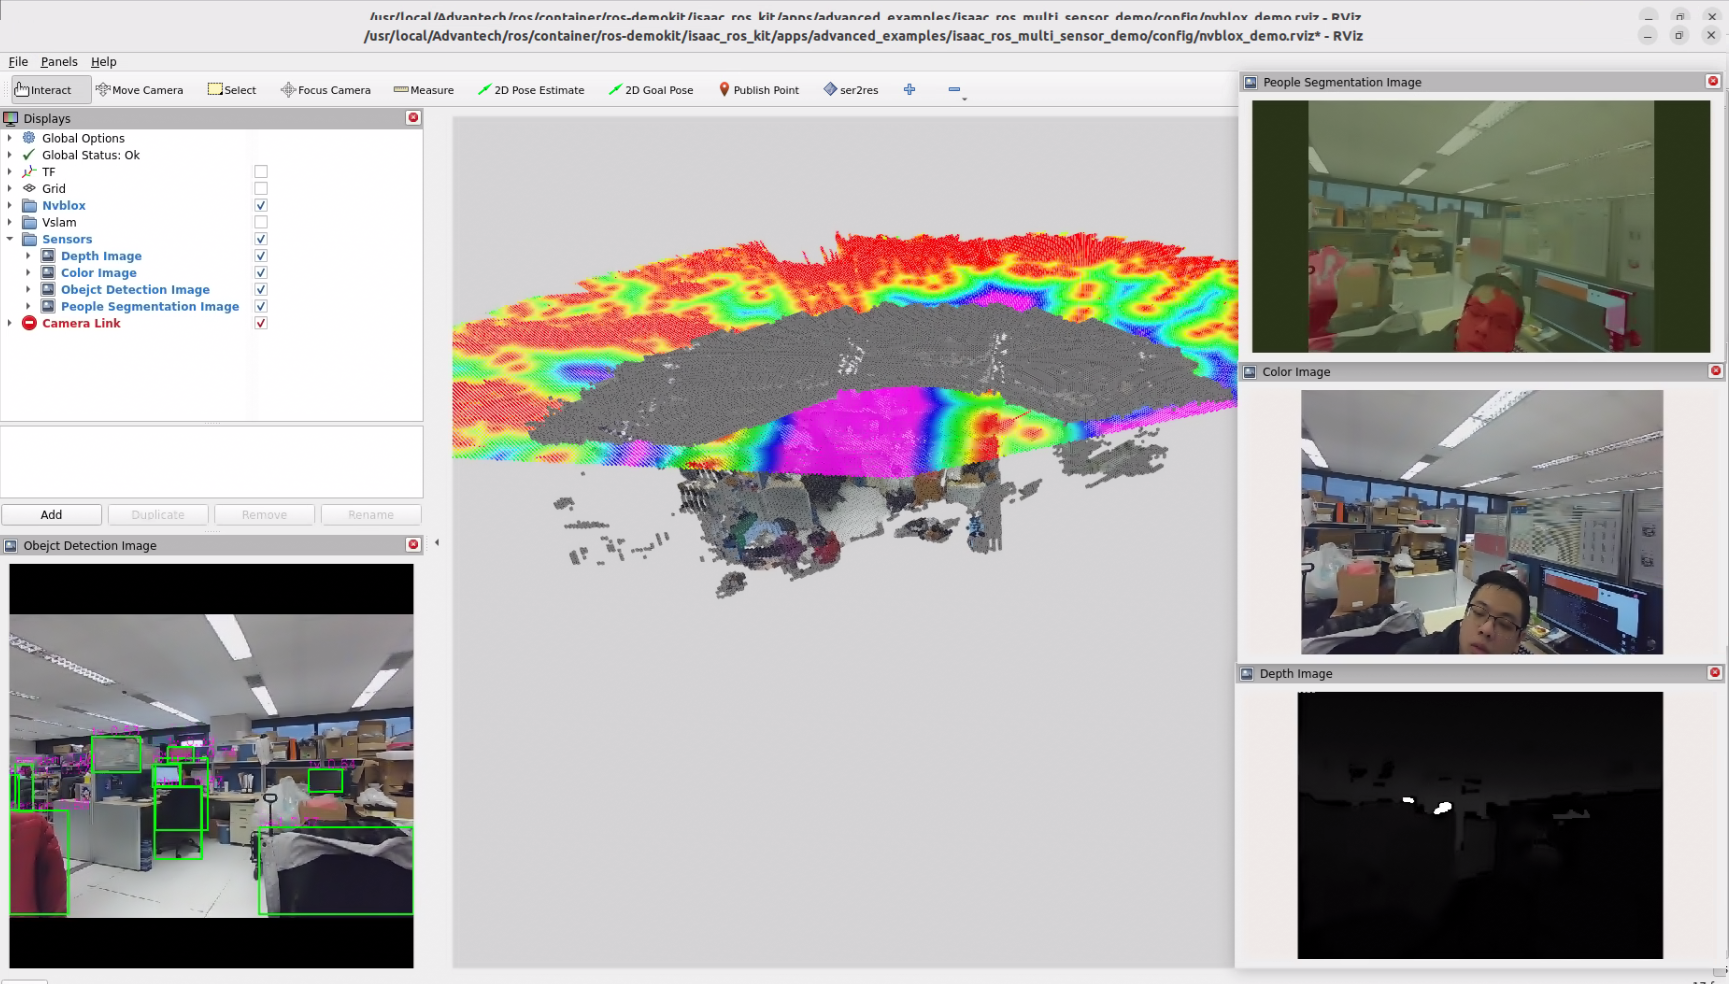
This demo runs several ISAAC workloads side-by-side—nvblox, yolov8, and unet—using data from two physical cameras. The rendered RViz layout is:
- Bottom-left: isaac_ros_yolov8
- Center: isaac_ros_nvblox
- Top-right: isaac_ros_unet
- Right-center: RGB stream
- Bottom-right: Depth stream
What this example launches
When you run:
./launch_isaac.sh advanced_examples/isaac_ros_multi_sensor_demo
the following components are started:
- A ROS bag that replays data from two cameras. The recorded topics include:
- /camera_0/color/image_raw, /camera_0/depth/image_raw, /camera_0/left_ir/image_raw, /camera_0/right_ir/image_raw, plus accompanying /camera_info
- /camera_1/color/image_raw with its camera_info and metadata
- /tf_static for the fixed transforms between the sensors and the robot
- visual_slam: consumes the RGB-D stream, TF, and odometry to estimate pose.
- nvblox: builds the live 3D reconstruction using the pose from visual_slam and the depth frames.
- yolov8: performs object detection on the RGB feed.
- unet: runs semantic segmentation in parallel with detection to highlight regions of interest.
- RViz layout: aggregates every output into a tiled dashboard so you can see how each workload reacts to the same scene in real time.
How to use
Sensor mapping
- Camera 0 provides RGB, depth, and IR streams for visual_slam, UNet and nvBlox.
- Camera 1 supplies an additional RGB view for YOLOv8 to keep inference quality high.
Launch flow
- Run the launch command above. The script automatically mounts the container, starts the ROS bag, and brings up all four workloads.
- Watch RViz populate: YOLOv8 detections appear bottom-left, NvBlox in the center, UNet top-right, RGB/Depth streams on the right side.
Extending to your hardware
- Replace the default ROS bag with captures from your own dual-camera rig while keeping the same topic names. That lets you reuse this demo as a validation harness for calibration, synchronization, and GPU load.
When to use this example
Use Multi Sensor Function when you:
- Want to showcase multiple ISAAC capabilities driven by the same sensor suite without juggling separate demos.
- Are validating camera synchronization, TF configuration, or launch parameters before deploying to an actual robot.
- Plan to compare perception outputs side-by-side (e.g., detection vs. segmentation vs. 3D reconstruction) for tuning or demo purposes.
GitHub
For detailed configuration, please refer to Robotic suite GitHub