Physical Demonstration Recording
On selecting physical recording, the platform performs the hardware readiness check, in which the camera, Leader Arm, and Follower Arm are all required. If the check does not pass, the configuration described in Hardware Integration & Calibration should be completed first.
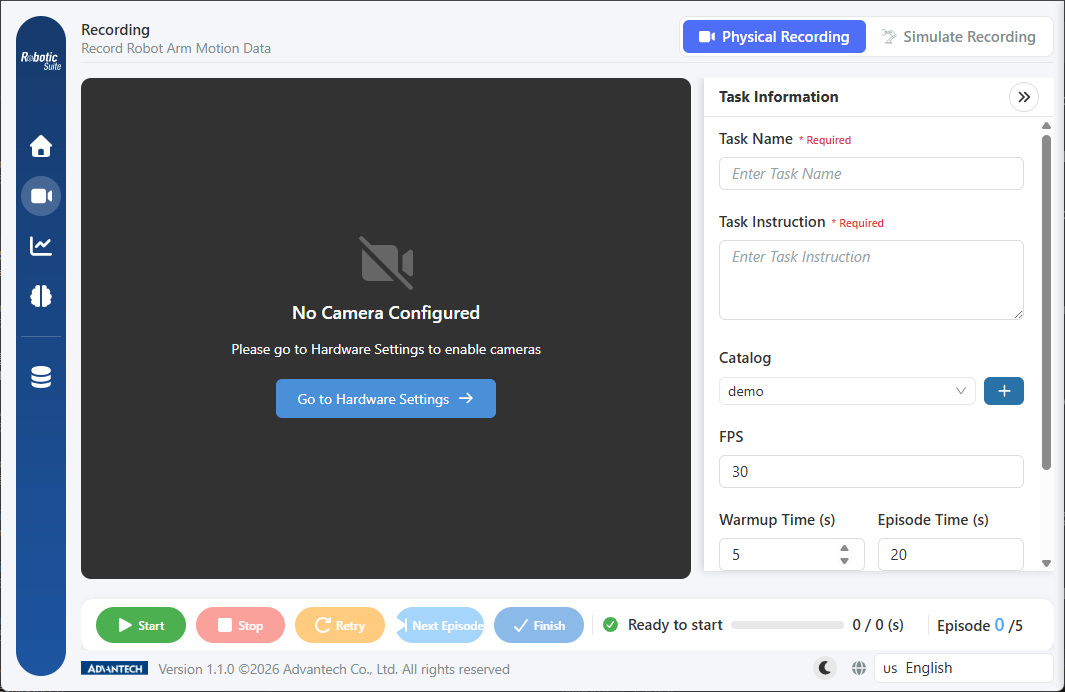
The figure above shows the recording page before any camera has been configured: the image area is replaced by "No Camera Configured" together with a shortcut to the hardware settings. The control bar remains visible in this state, but recording cannot in fact be executed.
1. Camera viewpoint design
The relative significance of viewpoint and camera specification
Data quality is determined by whether the viewpoint covers the critical information of the task, rather than by image resolution or sensor specification. If the viewpoint does not capture the contact between gripper and object, that information is absent from the dataset irrespective of image quality.
Standard configuration
| Viewpoint | Position | Information provided | Effect of omission |
|---|---|---|---|
| Wrist | Mounted near the gripper, moving with the arm | Close-range detail of gripper-object contact, grasp alignment, and gripper actuation timing | The model can approach the object but cannot determine when to close the gripper |
| Top | Fixed above the work area, viewing downward | Object position within the work area and the relative position of arm and target | The model cannot determine object position and can only repeat a fixed trajectory |
This two-camera configuration covers the information required by most pick-and-place tasks and constitutes the recommended initial configuration.
Criteria for adding a third viewpoint
An additional viewpoint increases data volume, extends training time, and introduces a further variable into the recording process. It should therefore be adopted only where the standard configuration demonstrably cannot cover the critical information. Two cases commonly apply:
- The workpiece is frequently occluded by the arm itself: the top viewpoint is obscured as the arm reaches in, precisely at the moment of contact.
- The task requires judgement of depth or height: for example insertion and stacking operations, where height differences are not readily distinguished from a top viewpoint.
The assessment may be made by observing directly from the camera position: information that cannot be discerned by eye cannot be obtained by the model either.
Placement principles
First, camera positions must not change during recording. If the top camera is displaced by external force during a recording session, the spatial relationships described by the data before and after will be inconsistent. Cameras should be securely fixed and positioned away from personnel routes.
Second, the field of view must cover the full extent of the task. The object's start position, destination, and the path travelled by the arm must all lie within the frame. A common omission is to frame only the start position, resulting in the placement motion occurring outside the frame.
Third, lighting conditions must remain stable. The model incorporates lighting variation into its basis for judgement. Where the work area is subject to natural light, stable artificial lighting should be added, or recording should be confined to a consistent time period.
Fourth, the variation present in operation should be incorporated during recording. If the workpiece is placed manually and its position is not fixed in actual operation, the workpiece position should be varied between episodes during demonstration so that the data covers that variation.
Confirming display names
The camera names obtained on detection are generic indices. Following connection, the display names should be edited under Data Tools → Hardware Settings → Camera Management to correspond to the actual mounting positions, and the enabled state of each camera should be confirmed — cameras that are not enabled are not recorded into the dataset. See Camera Setup & Management.
2. Task information settings
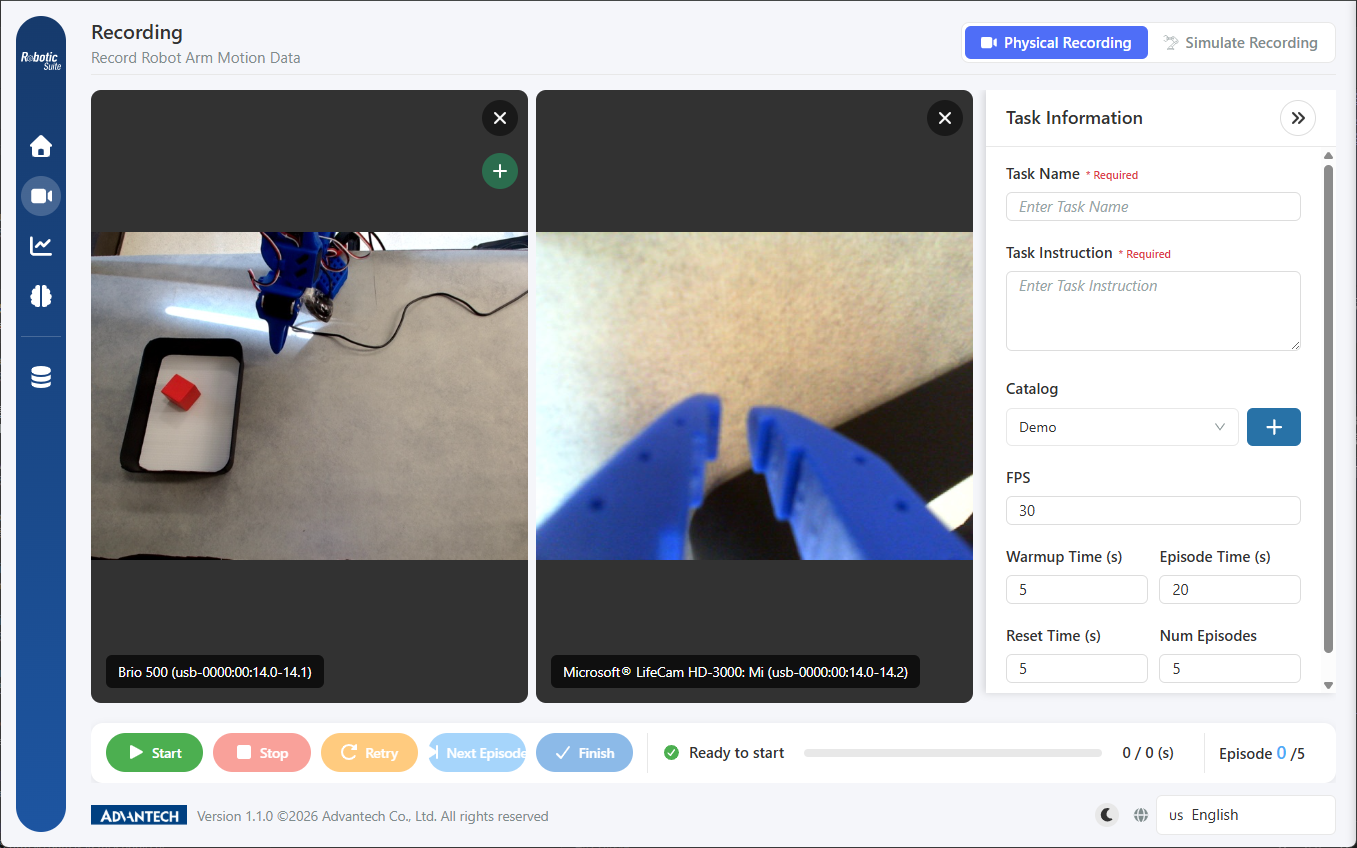
Selecting the task information button at the top right of the recording page opens the settings drawer, which contains eight fields (on the right of the figure above; scrolling is required to see all of them):
| Field | Default | Description |
|---|---|---|
| Task name (required) | — | The name of this batch of demonstrations, used as the dataset folder name |
| Task instruction (required) | — | A single natural-language sentence describing the task |
| Catalog | — | The storage directory for this batch; a new directory may be created via the plus button |
| FPS | 30 | Image frames and joint angle records captured per second |
| Warmup time (s) | 5 | Buffer preceding formal recording in each episode; not recorded |
| Episode time (s) | 20 | Duration of a single demonstration |
| Reset time (s) | 5 | Interval between episodes; not recorded |
| Number of episodes | 5 | Episodes recorded consecutively; recording stops automatically on reaching this value |
Several of these fields require further explanation.
The task instruction carries different significance for the two policies. For GR00T N1.5 the field constitutes an actual model input, and the model interprets its content in order to determine the task objective; it should therefore be described specifically, and the same or a closely similar instruction should be used at inference. For ACT the field serves primarily as dataset annotation.
The default FPS value is appropriate for most tasks. Values that are too low omit detail from rapid motions, while values that are too high multiply both data volume and training time. The default should be retained in the absence of a specific reason.
Episode time is the field most requiring task-specific adjustment. It should be set according to the time required to complete the task without haste, with a margin of several seconds. Insufficient values cause the demonstration to be truncated before the motion completes; excessive values produce a segment of stationary arm motion at the end of each episode, which is likewise incorporated into learning.
The default number of episodes is an initial value rather than a recommendation. The number actually required depends on the policy selected: ACT generally requires dozens of iterations, whereas GR00T N1.5 completes fine-tuning with a small number of demonstrations. Recording may also be performed across multiple sessions into the same directory.
3. The execution cycle of an episode
Once configuration is complete, the control bar at the bottom of the screen provides five buttons. Recording constitutes a cyclical process:

Each stage in the figure corresponds to the status text on the control bar, and only those marked Recorded are written into the dataset.
Two behaviours warrant attention: the warmup stage executes only once at the start of the process (marked RUNS ONCE in the figure) rather than before each episode; and a write is performed on completion of each episode rather than at the end of the batch. The cycling of "Recording → Saving → Reset" on screen is therefore expected.
| Button | Purpose | Applicable circumstance |
|---|---|---|
| Start | Initiates the recording process | Configuration confirmed and the operator in position |
| Stop | Terminates the current process | Site conditions require an immediate halt |
| Retry | Discards the current episode and re-records it | The quality of the current demonstration does not meet requirements |
| Next episode | Ends the current episode early and proceeds to the next | The task is complete and the remaining episode time need not elapse |
| Finish | Ends the batch and writes the dataset | The required number of episodes has been reached |

The status text on the control bar (Ready, Warmup, Recording, Reset, Saving) should be monitored throughout recording, as it is the basis for determining whether the current motion is being recorded. Two further live indicators appear to the right of the status text: a progress bar with the elapsed seconds of the current episode (6 / 20 above, the sixth second of a 20-second episode time), and the episode counter (Episode 1 / 5 above). The denominator of each is the episode time and number of episodes configured in the task information.
The availability of each button varies with the stage of the procedure; "Start", for example, is disabled while recording is in progress. A greyed-out button indicates that the operation does not apply at the current stage rather than an anomaly.
As episode time is generally configured somewhat longer than actually required, selecting "Next episode" upon task completion reduces the stationary segment at the end of each episode and shortens the duration of the batch.
4. Demonstration quality criteria
This section does not concern interface operation, but its content directly determines the value of the dataset.
Demonstrations meeting requirements
- Continuous motion: completed in a single pass from start to destination, without intermediate pauses.
- Consistent speed: a comparable tempo between episodes.
- Consistent path: a similar overall path, permitting natural variation arising from differences in object position.
- Actual completion: the task is genuinely completed rather than terminated near completion.
Circumstances requiring re-recording
| Circumstance | Reason |
|---|---|
| Hesitation or a pause during the motion | The pause is learned as part of the motion, and the model will stall at the corresponding point during inference |
| Alignment achieved only after repeated correction | The model learns a pattern of initial deviation followed by correction rather than direct alignment |
| A slip, or the workpiece being knocked over | The episode records a failed process |
| Occlusion of the camera during the motion | Critical imagery is obscured and the episode's image data contains a gap |
| Motion extending beyond the frame | Visual information for that segment of the motion is unavailable to the model |
Demonstrations of insufficient quality are more damaging than insufficient data A reduction in data volume merely reduces the number of samples available for learning. Retaining demonstrations of insufficient quality, by contrast, incorporates erroneous patterns into the learned behaviour, and this condition does not manifest during training — the loss curve declines normally, and the symptom becomes observable only at the inference stage, by which point tracing the specific episode is difficult.
The cost of re-recording at the time is a single demonstration; the cost of subsequent investigation is the reproduction of the entire batch.
5. Post-recording procedure
On selecting "Finish", the platform writes the dataset and provides a link to the data tools page. Two operations are recommended on that page:
- Preview: play back each episode to confirm that all constitute complete and usable demonstrations. This is the final quality gate of the recording process.
- Delete episodes: remove episodes whose deficiencies were not identified during recording.
Where recording was performed across multiple sessions, the datasets may also be merged into a single dataset before training. See Dataset Management.
Next: Dataset management.