StereoLabs Camera Integration
StereoLabs Cameras with AFE-A702
This guide shows the implementation procedure for integrating StereoLabs cameras on the AFE-A702 including physical connection, driver installation with frame synchronization mode, ZED Utilities, and ROS2 node.
The source was prepared for the following environment:
| Item | Description |
|---|---|
| Platform | AFE-A702 |
| Validated Camera | ZED X / ZED X Mini / ZED X nano |
| OS Version | Jetpack 7.2 v1 (Ubuntu 24.04) |
| ROS distribution | ROS 2 Jazzy |
| ZED SDK | 5.5.0 |
| ZED ROS 2 wrapper | branch v5.5.0 |
These are tested-source values, not a compatibility claim for other versions of BSP, SDK, or package combinations.
1. Connect the camera with power removed
Power off the AFE-A702 before attaching the camera FAKRA cables. AFE-A702 supports as many as 8 ZED X series cameras.
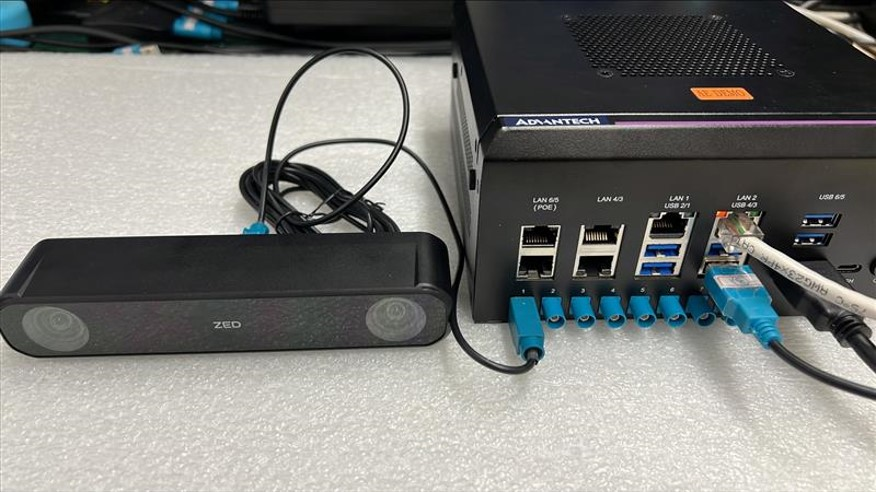
After hardware connection ready, restore the AFE-A702 power and enter Ubuntu desktop.
2. Install the ZED X series camera driver
Download the ZED X series camera driver from GMSL driver for AFE-A702 and follow the steps to install the driver and reboot.
$ unzip StereoLabs_ZEDX_AFE-A702_Jetpack7.2v1_20260922.zip
$ cd StereoLabs_ZEDX_AFE-A702_Jetpack7.2v1_20260922/
$ sudo dpkg -i StereoLabs_ZEDX_AFE-A702_Jetpack7.2v1_20260922.deb
$ sudo reboot
After reboot, install the V4L2 utilities and enumerate the video nodes. Each ZED X camera should appear as two video nodes, one for the left stream and one for the right stream.
$ sudo apt install v4l-utils -y
$ v4l2-ctl --list-devices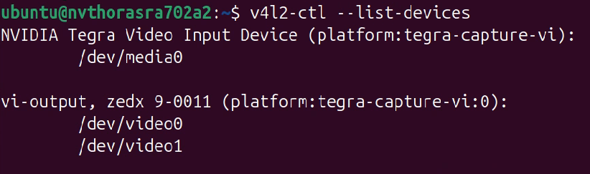
3. Validate Left and Right Streams
Install the NVIDIA GStreamer package with the target version for Jetpack 7.2 on AFE-A702; a different BSP will require a different version.
$ sudo apt install nvidia-l4t-gstreamer=39.2.0-20260601141651Start the two video streams separately:
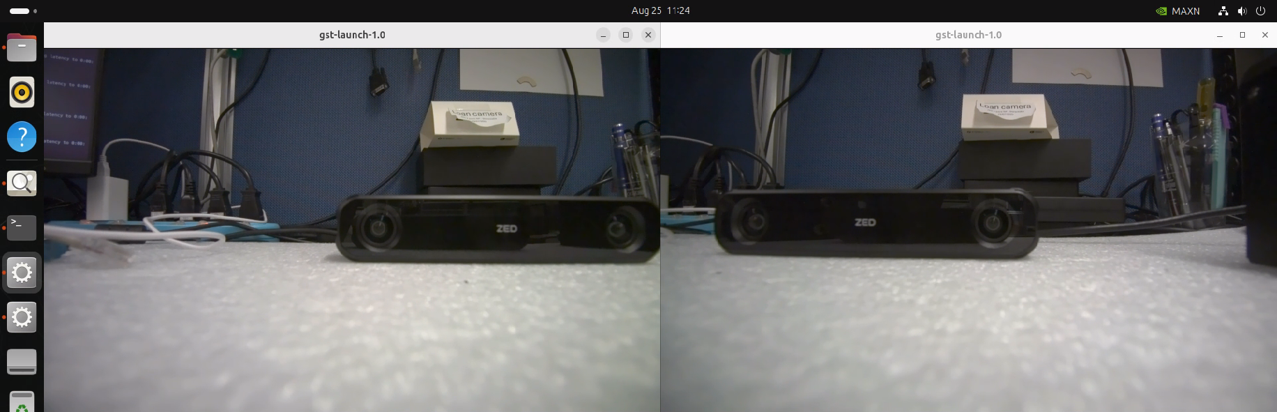
$ gst-launch-1.0 nvarguscamerasrc sensor-id=0 ! nvvidconv ! xvimagesink
$ gst-launch-1.0 nvarguscamerasrc sensor-id=1 ! nvvidconv ! xvimagesinkThe sensor-id=0 is the right eye of the first stereo camera, and sensor-id=1 is the left eye.
For second camera, the sensor-id=2 will be right eye and sensor-id=3 will be left eye, and so on.
4. Switch Frame Synchronization Mode
The ZED X series camera supports frame synchronization modes and the default is no sync mode. The user can edit the zed_x_daemon.service setting to switch the mode, and the command below sets the camera to frame synchronization mode.
$ sudo sed -i 's/^sync_mode=0/sync_mode=2/' /etc/systemd/system/zed_x_daemon.service
$ sudo systemctl daemon-reload
$ sudo systemctl restart zed_x_daemon.service
After mode switch, enter the super user mode and set the duty cycle and frequency of the sync signal.
The duty cycle should be 25% and the frequency should be the frames per second that all cameras support.
$ sudo -s
# cd /sys/class/cdi_tsc_class/cdi_tsc
# echo 25 > duty_cycle
# echo 30 > freq_hz
The above commands will synchronize all connected cameras to the same frame timing.
These commands have to be executed every system boot up, so the user can set them to the startup script to make them persistent.
The user can use the ZED_Studio utility that will be installed in the next section to check the synchronization status.
5. ZED SDK
Download the ZED SDK for Jetpack 7.2 from the StereoLabs ZED SDK release page. This guide is using version 5.5.0, and the following commands install the SDK on AFE-A702.
$ chmod +x ZED_SDK_Tegra_L4T39.2_v5.5.0.zstd.run
$ ./ZED_SDK_Tegra_L4T39.2_v5.5.0.zstd.run
The installer is interactive and may download additional models. Read each prompt before answering. After installation, the ZED SDK and utilities will be available for use.
ZED_Studio
Open the ZED_Studio utility to inspect the connected camera and its left/right RGB streams.
Reference official website: ZED Studio guide.
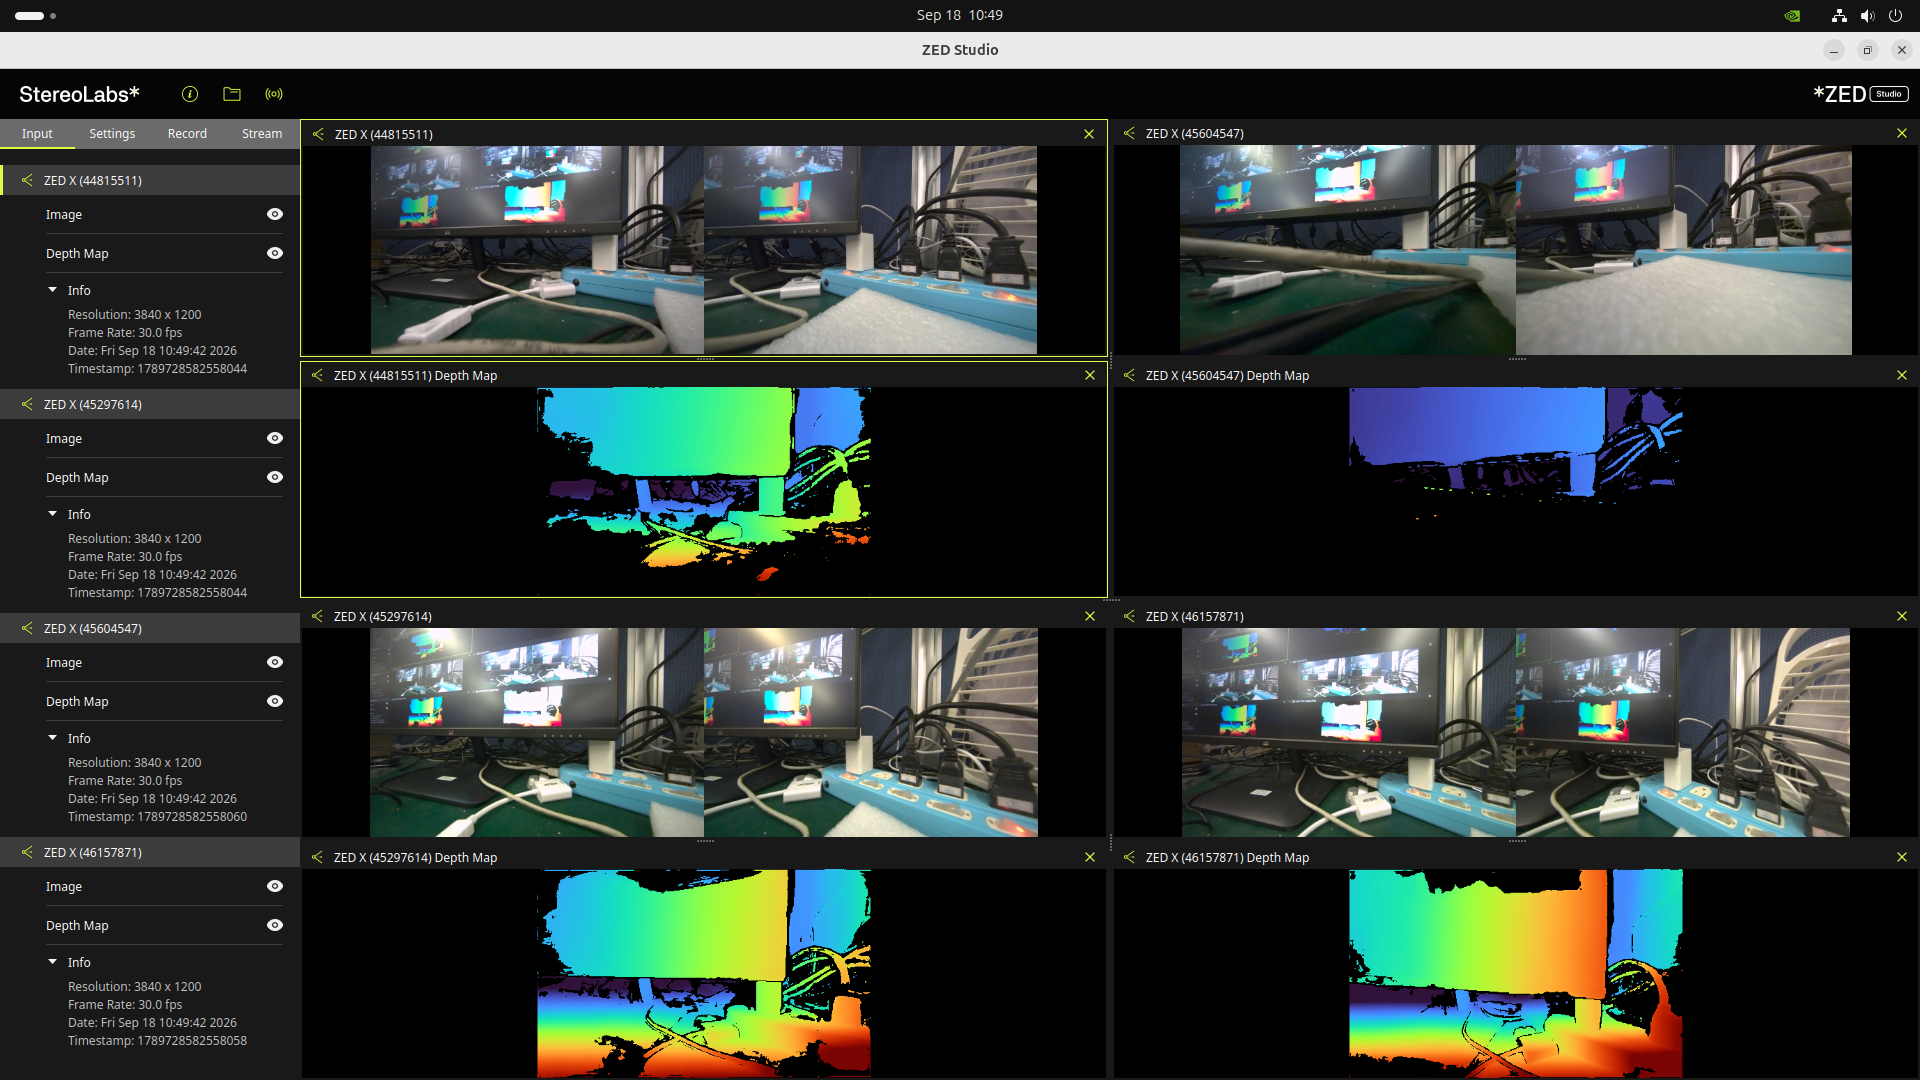
$ ZED_StudioOn the left side of ZED Studio, the connected cameras are shown. Click the eye icon to the right of Image and Depth Map to display the camera's left/right RGB images and depth stream. The lower section displays the current camera information.
Please wait for each video stream to output normally before opening the next one.
The image below illustrates the simultaneous activation of the RGB streams and depth maps for all four cameras.
6. ZED ROS 2 wrapper
Make sure the AFE-A702 has an active internet connection and that the ROS 2 Jazzy environment is installed.
Install ROS 2 Jazzy by installing the Advantech Robotic Suite or following the instructions on the ROS official installation guide.
Follow StereoLabs official github to build the ZED ROS 2 wrapper for ZED X series cameras.
Install the dependencies
$ sudo apt update && sudo apt install python3-rosdep python3-colcon-common-extensions \
    ros-${ROS_DISTRO}-zed-msgs ros-${ROS_DISTRO}-nmea-msgs ros-${ROS_DISTRO}-geographic-msgs \
    ros-${ROS_DISTRO}-diagnostic-updater ros-${ROS_DISTRO}-robot-localization \
    ros-${ROS_DISTRO}-backward-ros ros-${ROS_DISTRO}-zed-description v4l-utils -y
Create workspace and build the StereoLabs zed-ros2-wrapper
$ mkdir -p ~/ros2_ws/src/
$ cd ~/ros2_ws/src/
$ git clone https://github.com/stereolabs/zed-ros2-wrapper.git -b v5.5.0
$ cd ..
$ sudo rosdep init && sudo rosdep update
$ sudo rosdep install --from-paths src --ignore-src -r -y
$ colcon build --symlink-install --cmake-args=-DCMAKE_BUILD_TYPE=Release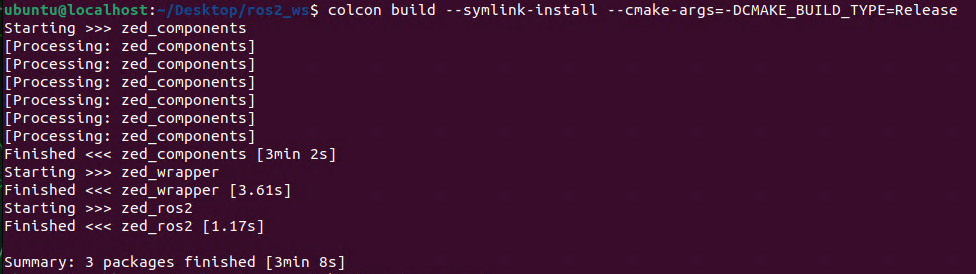
Set source the setup script from the workspace root and optionally make it persistent.
$ echo source ~/ros2_ws/install/local_setup.bash >> ~/.bashrc
$ source ~/.bashrc
Start the ROS 2 node
Launch the ZED ROS2 node with camera_model, camera_name, camera_id parameters, the example command is shown below.
$ ros2 launch zed_wrapper zed_camera.launch.py camera_name:=zed_front camera_model:=zedx camera_id:=0| Parameter | Description |
|---|---|
camera_model | Connected camera model, includes zed, zedm, zed2, zed2i, zedx, zedxm, zedxnano, zedxhdrmini, zedxhdr, zedxhdrmax, virtual, zedxonegs, zedxone4k, zedxonehdr. |
camera_name | The namespace for this camera's ROS 2 node topics. |
camera_id | Camera ID that can be checked by command $ ZED_Explorer -a. |
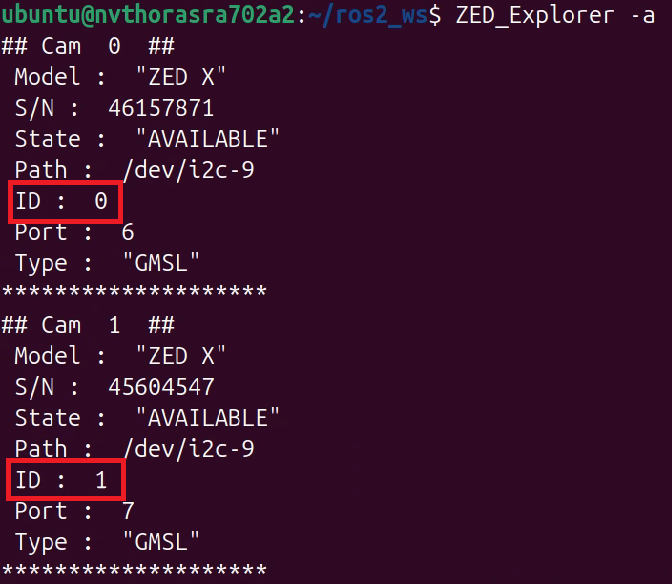
Open another terminal and run the above command with different camera_name and camera_id to start the second node if a second camera is connected to the AFE-A702.
$ ros2 launch zed_wrapper zed_camera.launch.py camera_name:=zed_back camera_model:=zedx camera_id:=1Open a new terminal and list all ROS 2 topics using the ros2 topic list; the camera topics should appear in the list.
$ ros2 topic list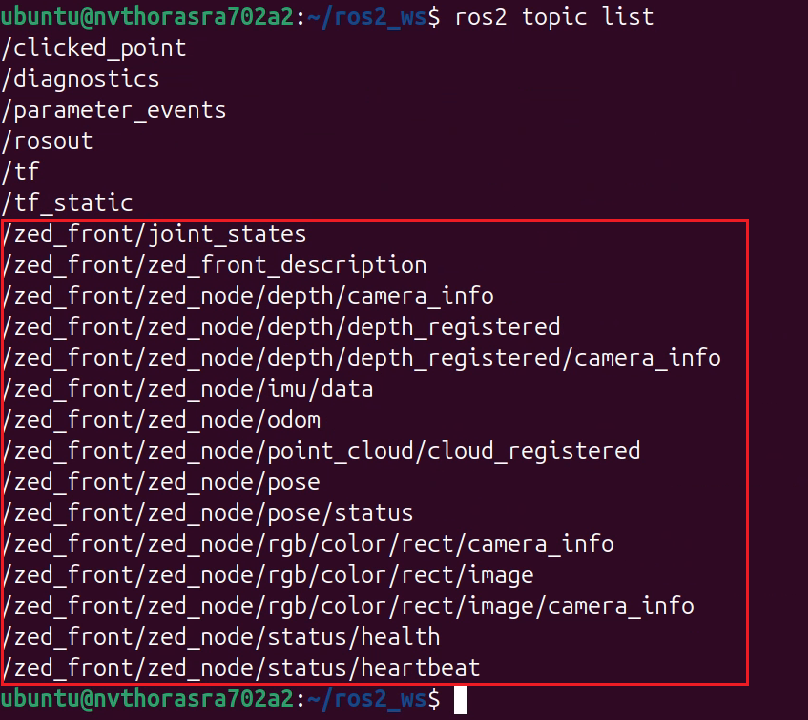
Data Visualization with RViz2
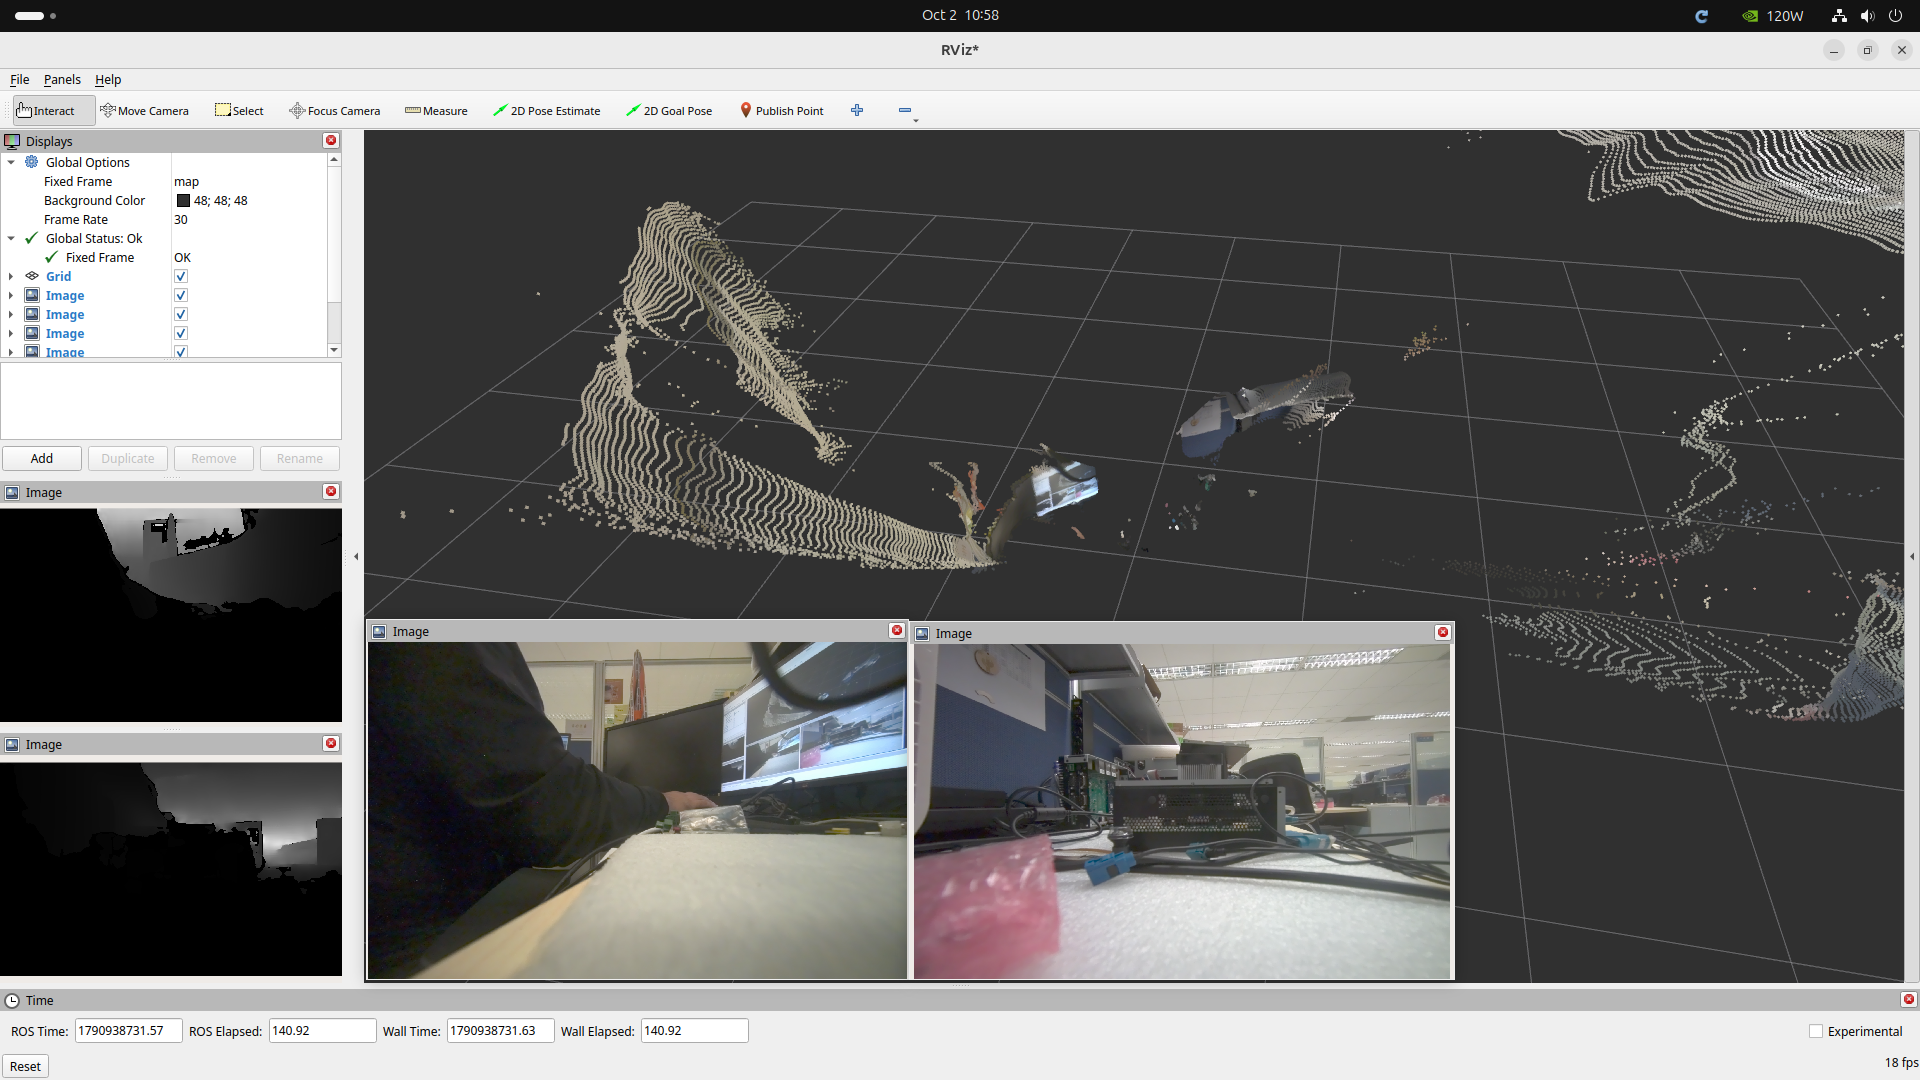
Open RViz2 to visualize the camera output. Make sure the started nodes are running and the topics are active.
$ rviz2Add the topic /zed_front/zed_node/rgb/color/rect/image for the RGB stream and /zed_front/zed_node/depth/depth_registered for the depth stream, and the topic /zed_front/zed_node/point_cloud/cloud_registered for the point cloud.
7. Performance Recording
| Item | Configuration |
|---|---|
| Camera Model | ZED X |
| Camera Number | 4 |
| Resolution | Left eye 1920x1200@30, Right eye 1920x1200@30, Depth 1920x1200@30 |
| CPU Usage (within 10 mins) | Max: 30%, Min: 25%, Avg: 27.18% |
| GPU Usage (within 10 mins) | Max: 96%, Min: 12%, Avg: 78.25% |
| Test Result | All video channels remain at 30 FPS; screenshot shown in section 5. |