Obstacle Avoidance on ASR-D501 with Qualcomm AI Hub Models
This guide demonstrates how to build an obstacle avoidance pipeline on the ASR-D501.
Overview
- Model Optimization & NPU Acceleration: Use Qualcomm AI Hub to export a YOLO object detection model tailored specifically for the QCS6490 chipset. This seamless deployment enables the device to run high-speed, hardware-accelerated inference directly on its NPU.
- Scalable ROS 2 Architecture: Use the OrbbecSDK ROS 2 to publish real-time RGB and depth image topics from the 3D camera. This publish-subscribe method ensures modular, low-latency sensor communication that easily integrates with drone control systems.
- Analysis & Decision: This demo combines the detection bounding boxes with the depth data to estimate the distance to obstacles, ultimately determining the required avoidance direction (Left, Center, or Right) for the flight controller.
What is Qualcomm AI Hub?
Qualcomm AI Hub is a centralized model repository and optimization service designed to streamline the deployment of AI models onto Qualcomm-powered edge devices.
- Pre-Optimized AI Models: Access a wide library of production-ready models (such as YOLO, MobileNet, and ResNet) tuned specifically for Qualcomm architectures.
- Hardware Acceleration (NPU/GPU/CPU): Easily compile and quantize models into formats like ONNX, TFLite, or Qualcomm AI Runtime, ensuring full utilization of on-chip AI accelerators.
- Faster Time-to-Market: Eliminates the complexity of manual model quantization and hardware-specific kernel tuning for embedded developers.
System Requirements and Components
| Component | Specification |
|---|---|
| Platform | ASR-D501 (Qualcomm QCS6490) |
| OS Image | ASRD501A1-Ubuntu24.04-x07_v1.0.0 |
| 3D Camera | Orbbec Gemini 335Lg (USB) |
| Flight Controller | Pixhawk® 6C |
| Model | YOLOv8-Detection (from Qualcomm AI Hub Models) |
Workflow
Downloading Qualcomm AI Hub Model:
- Step 1: Select a QCS6490-compatible model from Qualcomm AI Hub
- Step 2: Prepare an isolated Python environment
- Step 3: Virtual environment setup (Install the model package)
- Step 4: Authenticate for Qualcomm AI Hub Workbench
- Step 5: Export Model for QCS6490
Obstacle Detection Demo:
- Step 1: Connect and identify the USB camera
- Step 2: Environment Setup (Install OrbbecSDK and OrbbecSDK ROS 2)
- Step 3: Download the Python file and run live inference
- Step 4: Connect to the flight controller
Downloading Qualcomm AI Hub Model
Step 1: Select a QCS6490-compatible model from Qualcomm AI Hub
Open the Qualcomm AI Hub model catalog, filter by Qualcomm Dragonwing™ QCS6490.
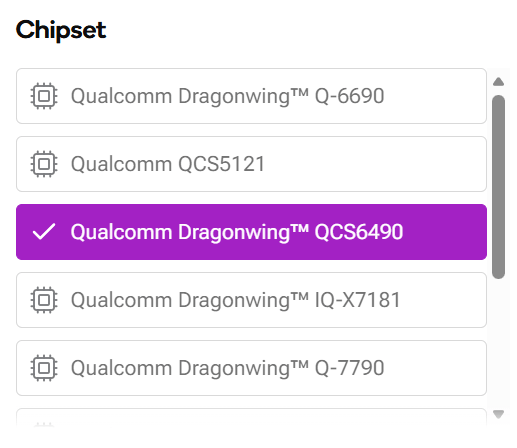
Select the model you want to run on your device. In this example, we choose YOLOv8-Detection.
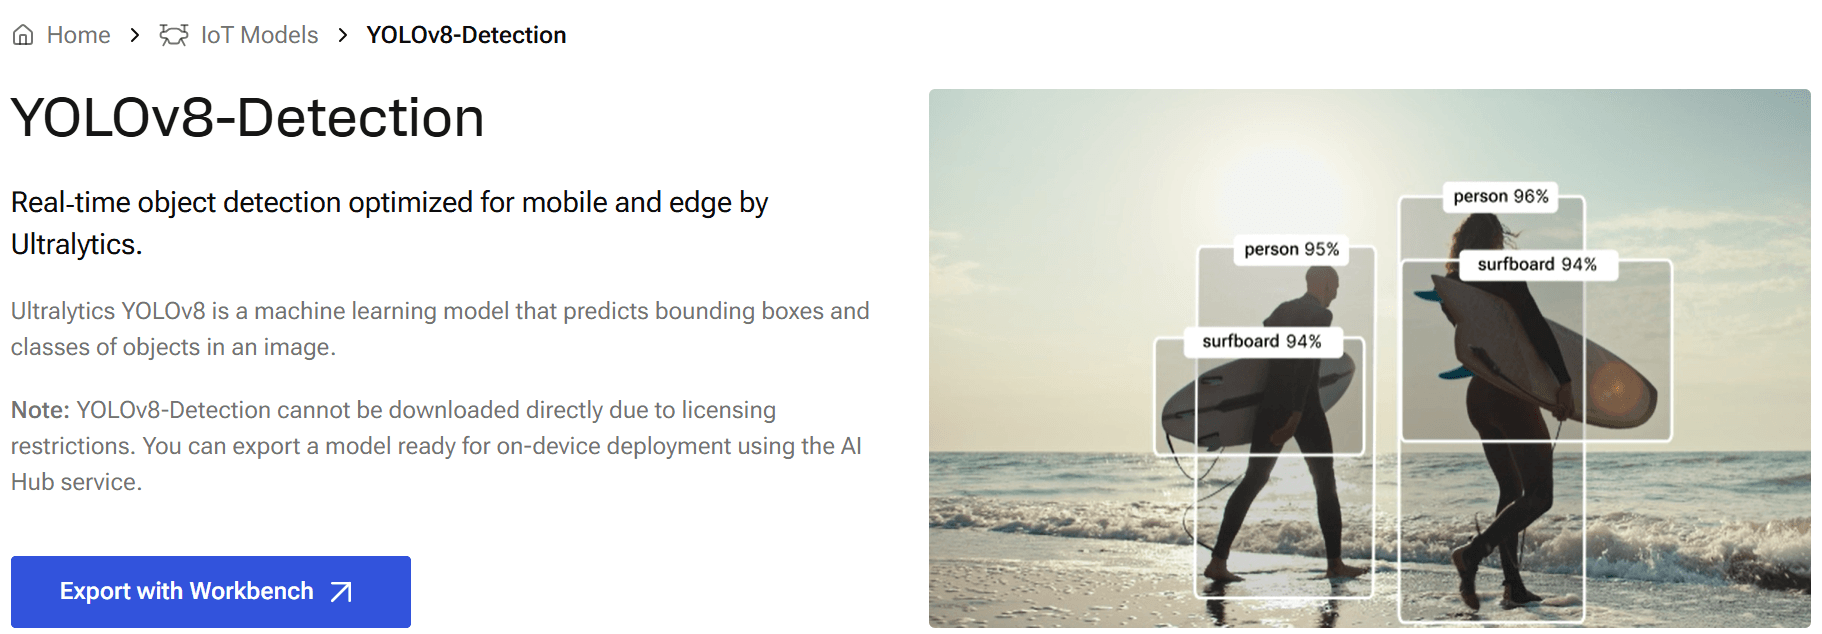
For export and runtime details, consult the YOLOv8-Detection source and documentation (GitHub).
Step 2: Prepare an isolated Python environment
Confirm that your Python version is supported by the selected qai-hub-models release.
You can check the supported Python versions on the GitHub page.
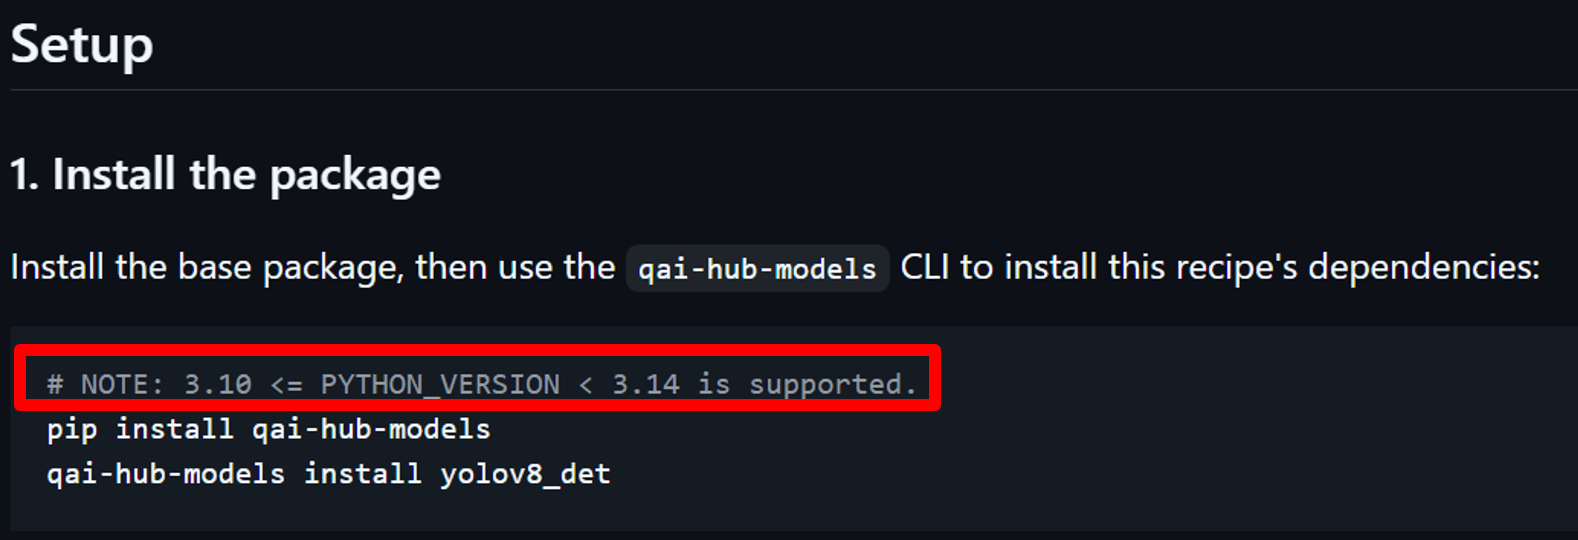
Create and activate a Python virtual environment to keep dependencies isolated
from the system Python.
Replace <venv_name> with your desired environment name:
sudo apt update
sudo apt install python3-venv
python3 -m venv <venv_name>
source <venv_name>/bin/activate
Step 3: Virtual environment setup (Install the model package)
Install Qualcomm AI Hub Models and the YOLOv8-Detection model:
pip install qai-hub-models==0.61.0
qai-hub-models install yolov8_det
Run the demo application with W8A8 quantization before exporting:
python3 -m qai_hub_models.models.yolov8_det.demo --quantize w8a8
The Demo Result is shown below.
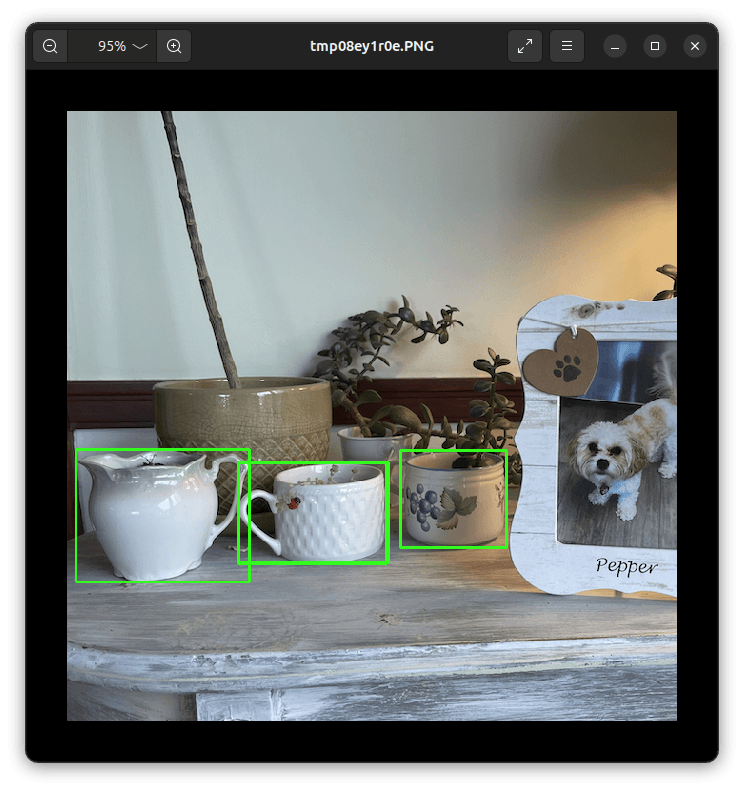
A successful demo confirms that the model and its dependencies are installed correctly before exporting.
Step 4: Authenticate for Qualcomm AI Hub Workbench
Create a Qualcomm AI Hub Workbench account, and get your API token from Account → Settings → API Token.
Configure the <API_TOKEN> obtained from the Qualcomm AI Hub Workbench account:
qai-hub configure --api_token <API_TOKEN>
Note: Treat <API_TOKEN> as a secret. Do not share it publicly, post it online, or include it in any screenshots.
Step 5: Export Model for QCS6490
Before exporting the model, you can list the options supported by the model you choose with the command below:
qai-hub-models export yolov8_det --help
Export a TensorFlow Lite (TFLite) model with 8-bit weights and 8-bit activations:
qai-hub-models export yolov8_det \
  --target-runtime tflite \
  --quantize w8a8 \
  --chipset qcs6490
In this example, the export pipeline is:
| Step | Stage | Action & Format | Description |
|---|---|---|---|
| 01 | Initial Compile | PyTorch (.pt) → ONNX | Converts the original PyTorch model into ONNX format. |
| 02 | Quantization | W8A8 | Applies W8A8 quantization to compress the model weights and activations. |
| 03 | Target Compile | Quantized ONNX → TFLite | Compiles the quantized model into the target runtime (.tflite). |
| 04 | Profiling | Device Benchmark | Measures latency and memory consumption on the physical device. |
| 05 | Inference | Real-world Validation | Executes test inference with sample inputs. |
Export jobs and their individual stages can be reviewed in Qualcomm AI Hub Workbench.
Qualcomm AI Hub Workbench views used to inspect the submitted model-export jobs and stage results.
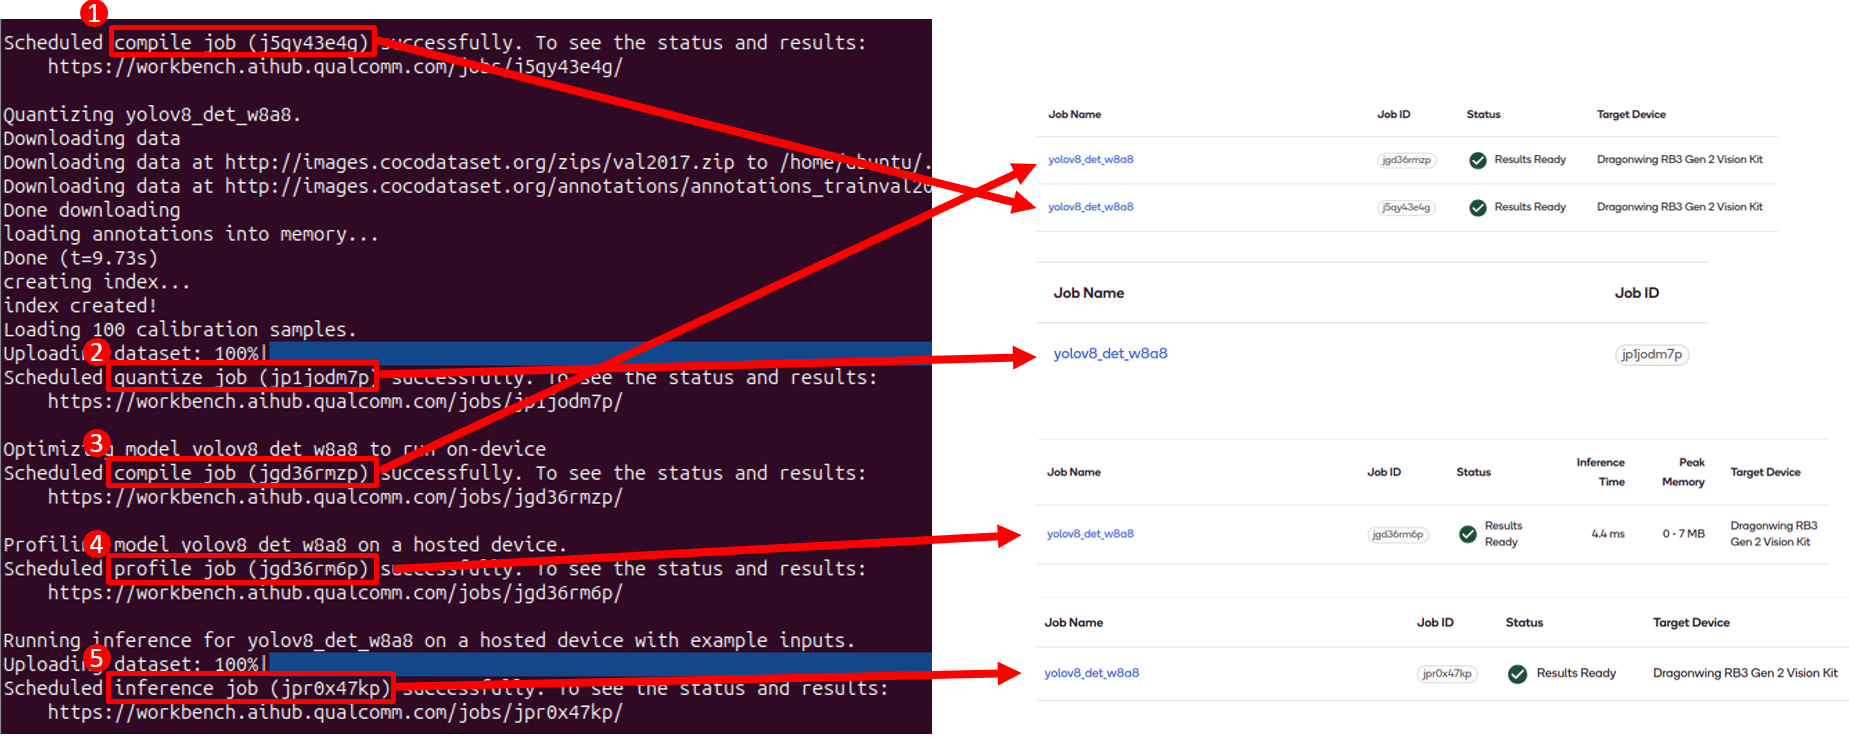
After the process is complete,
the outputs will be located in the ./export_assets/yolov8_det-tflite-w8a8 folder.
Once the model export is complete, you can safely exit the virtual environment:
deactivate
Obstacle Detection Demo
Step 1: Connect and identify the USB camera
Connect the Orbbec Gemini 335Lg to a USB Type-C port on the ASR-D501.
You can verify that the system detects the camera hardware by running the following command:
lsusb
Look for the Orbbec device in the output list to confirm a successful physical connection.
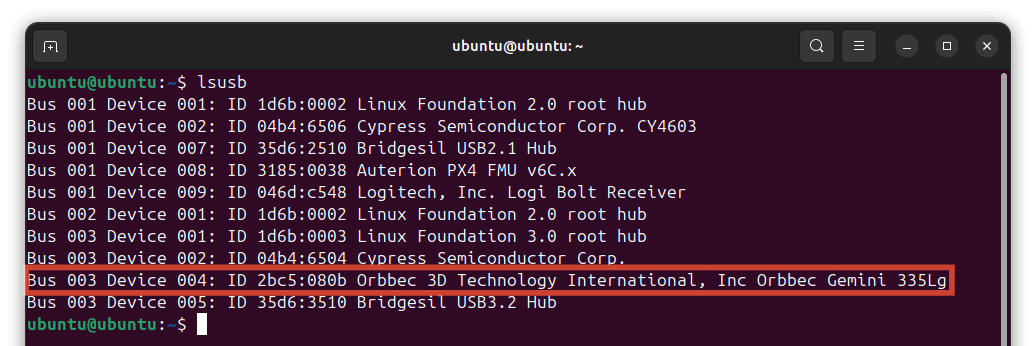
Step 2: Environment Setup (Install OrbbecSDK and OrbbecSDK ROS 2)
Since we use an Orbbec camera and ROS 2 for this project, we need to install the official OrbbecSDK and OrbbecSDK ROS 2 to get the camera data.
- OrbbecSDK v2 - v2.9.3 [Official GitHub Repository]
Please refer to the GitHub repository and follow the instructions to set up your workspace first.
After successfully installing the Orbbec SDK v2,
you can launch the OrbbecViewer.
This all-in-one graphical user interface (GUI) offers a suite of features including data stream preview, camera configuration, and post-processing.
The OrbbecViewer interface is shown below.
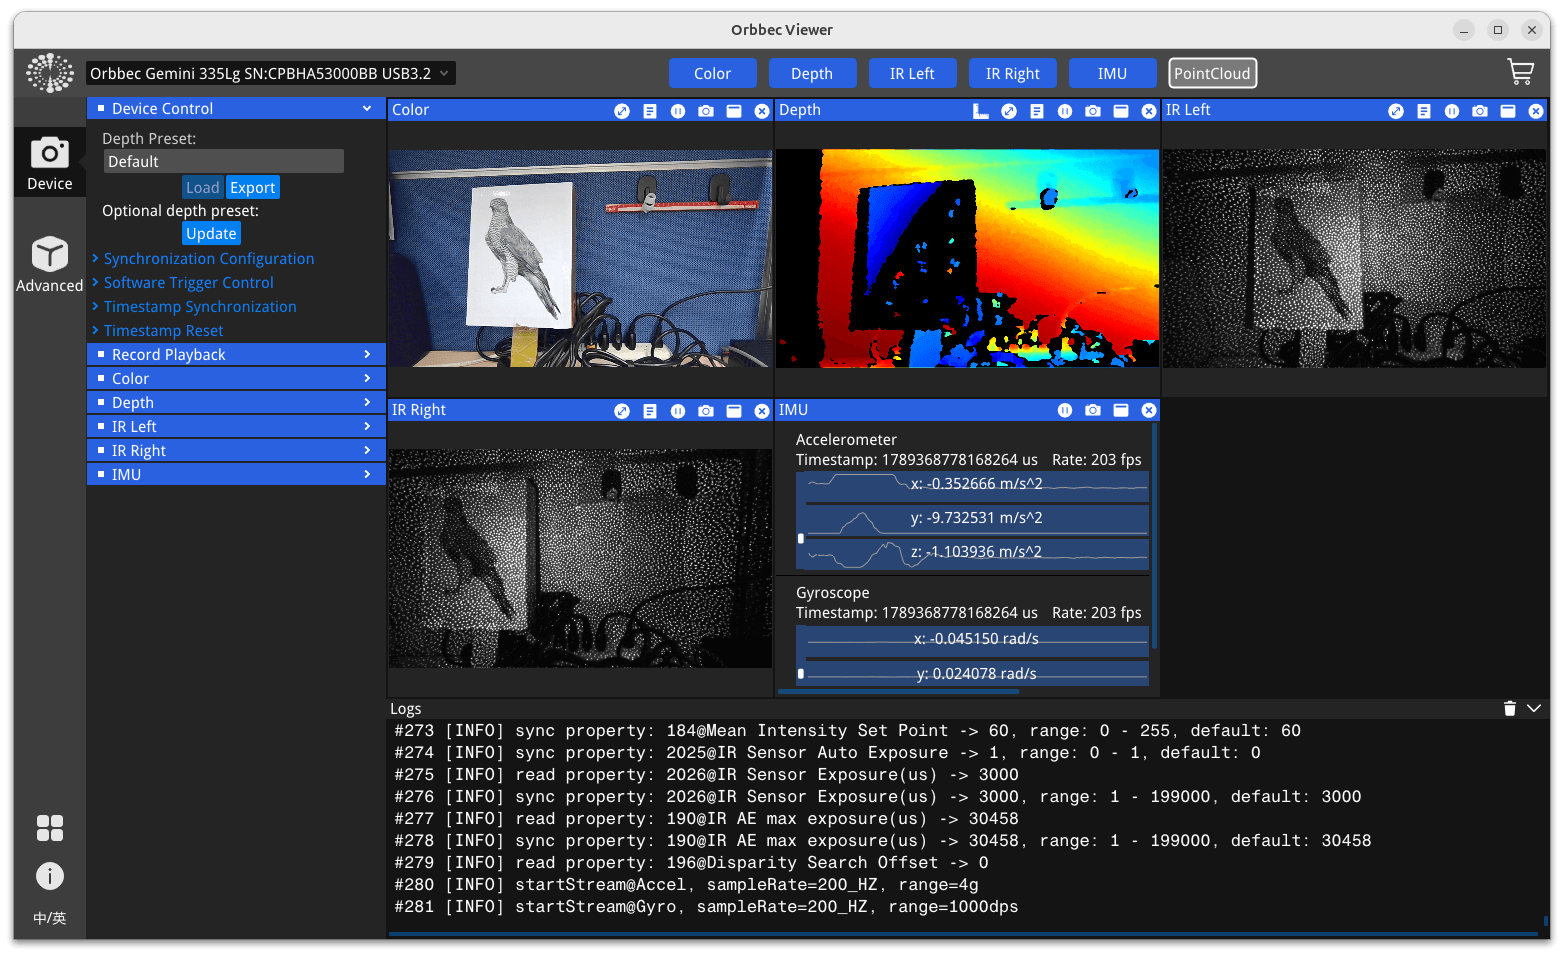
- OrbbecSDK ROS 2 - v2.9.3 [Official GitHub Repository]
Please refer to the GitHub Repository to clone the source code into the src directory of your ROS 2 workspace (~/ros2_ws/src).
Before building the package, you must modify the gemini_330_series.launch.py file
(in ~/ros2_ws/src/OrbbecSDK_ROS2/orbbec_camera/launch folder)
to set the specific resolution and frame rate for both the RGB and Depth:
- Width: 640, Height: 480
- FPS: 30
Please refer to the image below for the exact parameters to modify:


After saving the changes in the launch file, build the workspace so the configurations take effect:
cd ~/ros2_ws
colcon build --event-handlers console_direct+ --cmake-args -DCMAKE_BUILD_TYPE=Release
With the package successfully built, you are now ready to launch the camera node to publish the topics and monitor the live streams.
- On terminal 1 - Launch the camera node
source ~/ros2_ws/install/setup.bash
ros2 run orbbec_camera list_devices_node # Check if the camera is connected
ros2 launch orbbec_camera gemini_330_series.launch.py
- On terminal 2 - Use RViz2 to visualize the camera output
source ~/ros2_ws/install/setup.bash
rviz2
Once RViz2 opens, you can add an Image display to view the live RGB and depth topics.
You can follow the below image to add topics:
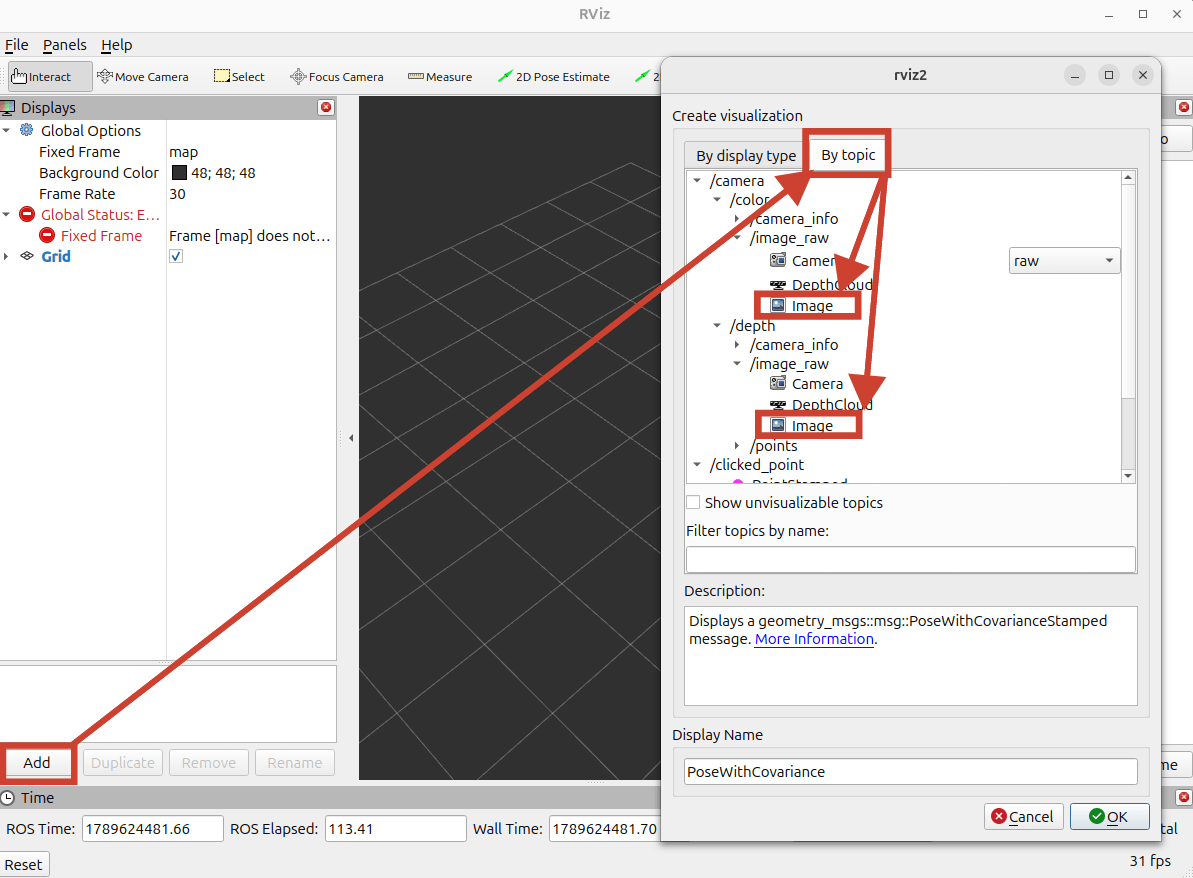
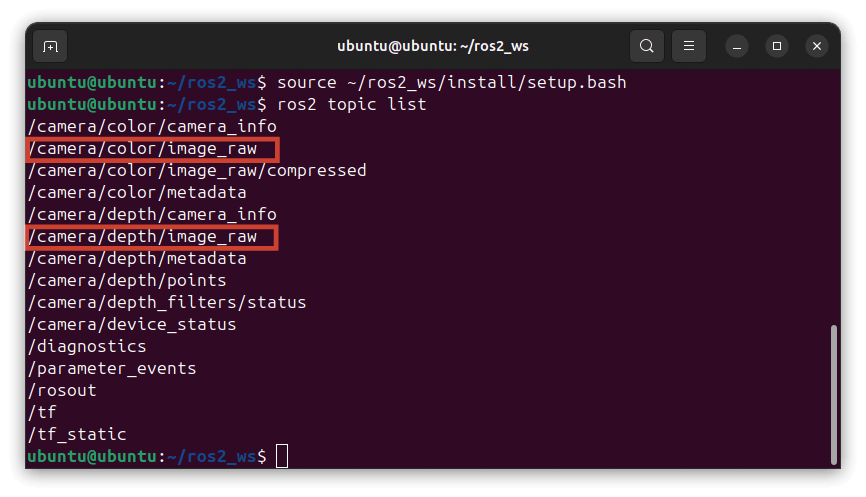
- On terminal 3 - List active ROS 2 topics
source ~/ros2_ws/install/setup.bash
ros2 topic list
Ensure that your camera successfully publishes the RGB and Depth topics, as shown below.
Step 3: Download the Python file and run live inference
Download the file obstacle_det.py
and place it in the same directory as your exported model.
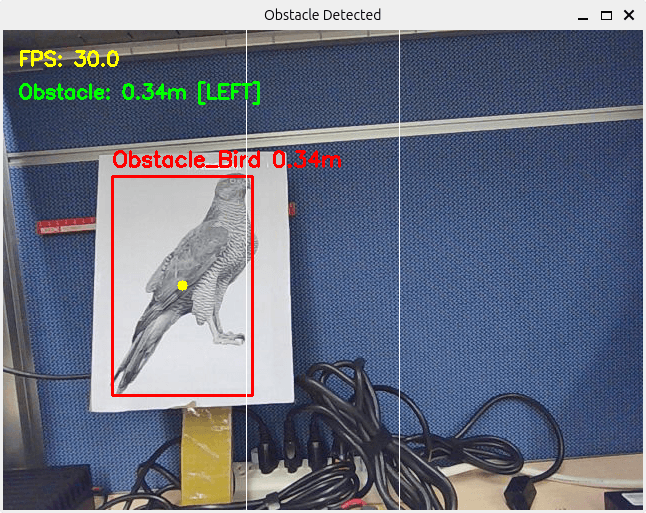
This script processes the live ROS 2 image streams,
detects birds (obstacles) and persons, and calculates the obstacle's location (Left, Center, or Right)
in the frame using the depth data.
Run the inference script:
source ~/ros2_ws/install/setup.bash
python3 obstacle_det.py
You should now see a window displaying the real-time bounding boxes and distance estimation!
Step 4: Connect to the flight controller
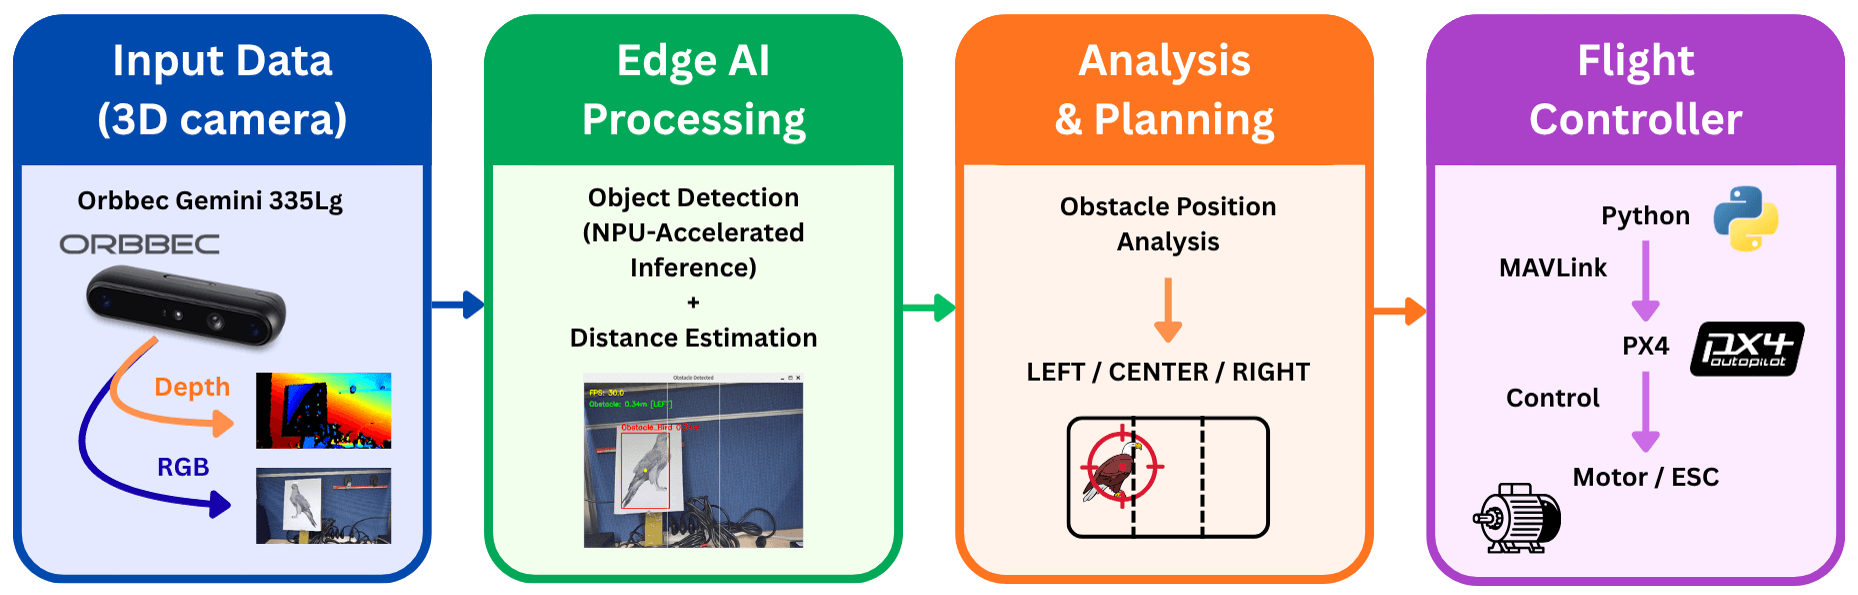
In our complete physical drone system,
once obstacle_det.py identifies where the obstacle is (Left, Center, or Right),
it sends a message to the flight controller.
The flight controller then triggers the appropriate motors to move the drone and avoid the obstacle.
Here is a simple workflow of the process:
Demo Video
Check out our real-world flight test video below to see the obstacle avoidance in action!